In this blog post you can read about how to make a natural lip balm and why it can be much better than buying one.
This post contains affiliate links.
Having a lip balm close at hand is essential to me, especially in the winter time when the weather is dry and cold. With such weather, my lips easily get dry, flaky and cracked. I reach towards my lip balm at least 5 times a day! So because I use it quite often, it is important that the lip balm is high quality, organic and non-toxic.
Lip balm is a product that’s applied directly on mouth. Which makes it even more important for it to be natural and free from potential toxic chemicals! Because when you eat, drink or lick your lips, the substances in the lip balm can easily enter the body.
This natural lip balm recipe is effective, 100 % natural and packed with nourishing ingredients for soft and luscious lips. If your want to learn how to make natural lip balm yourself, then keep on reading!
Why Make Your Own Lip Balm?
Making your own lip balm has a lot of benefits. Not only will you know exactly what your putting into it, but you can also give it the fragrance you want, adjust the consistency to your preference and make the lip balm 100% organic! Here are some of the benefits of making a homemade lip balm!
- You avoid toxic chemicals.
Unfortunately there are a lot of lip balms out there that contain ingredients that aren’t good for your lips, body or health. These ingredients are used in lip balms for various reasons. Preservatives are used to extend the shelf life so there is more time to sell the product. Cheap oils are used instead of organic and cold pressed oils, to increase the profit of the product by using cheap ingredients. Or synthetic perfume and silicones are added to make the lip balm more appealing with fragrance and an ultra soft feeling on your lips.
Even if this leads to you thinking that the products feels great, it is only creating an illusion of effectiveness. Because when you take a look at the ingredients, they actually do nothing good for your lips and can even make them dryer than before (which is great for the brand because you will need to buy even more lip balm!). When you make your own homemade lip balm you don’t have this problem. You will know exactly what you put into it and make sure that it only contains natural ingredients that really benefit and moisturize your lips!
✧ Read: Why Organic & Natural Makeup Is Better For You & The Earth
2. It is truly effective.
Lip balms bought at a commercial store are not always the most effective ones. I find myself reapplying them often and sometimes even find my lips dryer after frequent use. That is because regular lip balms usually don’t contain the best ingredients. Cheap ingredients are used to make the lip balm more affordable and profitable. Also chemicals are used to preserve the product and make it more appealing to the consumer.
When you make your own DIY lip balm, it will only contain high quality ingredients that are truly effective! You can chose from various organic and moisturizing oils and waxes depending on your preference. For example, beeswax is naturally anti-bacterial and creates a protective layer on your lips. Sweet almond oil is really moisturizing and helps to heal chapped or dry lips. You could even add in raw honey for sweetness and extra healing properties! Your homemade natural lip balm will not contain any unnecessary ingredients and only be packed with high quality ingredients that make it truly effective.
3. You save waste.
Lip balms often come in small plastic containers, packed in another plastic packaging. As you may know, plastic is hazardous for the planet, Eco-system and even human health. By making your natural DIY lip balm, you will save plastic from going to waste! Firstly because you won’t have to buy new lip balms in new containers. Secondly because you can reuse the containers from previous lip balms. And thirdly because buying ingredients for your DIY lip balm in bulk will save unnecessary package waste.
I usually save small jars and containers for my future DIY projects. If you haven’t saved empty lip balm containers, you can look for other small containers you have lying around in the house. Maybe you’ve received a skin care sample in a small jar once, or find a nearly empty make up container you could reuse! However, the best option would be to store your lip balm in steel or glass containers. This because of plastic containers can leak chemicals into the product when it includes oil and is stored in there for a longer time.
✧ Read: 27 Ways to Reduce your Plastic Waste [Starter Guide!]
4. You save money
Although there are some great organic and natural lip balms out there, they are usually a bit more expensive! You simply pay more for a product that is sustainably sourced, has high quality natural ingredients, is organic and plastic free. Also I can not count how many times my expensive lip balms mystically have disappeared, never to be found again.
That is why making a homemade lip balm will be much cheaper. Even if you pay more for all the ingredients up front, you can make a lot of lip balms from it! Therefore the price of a natural homemade lip balm is almost nothing compared to buying one. Especially, when you count in the high quality of your organic lip balm!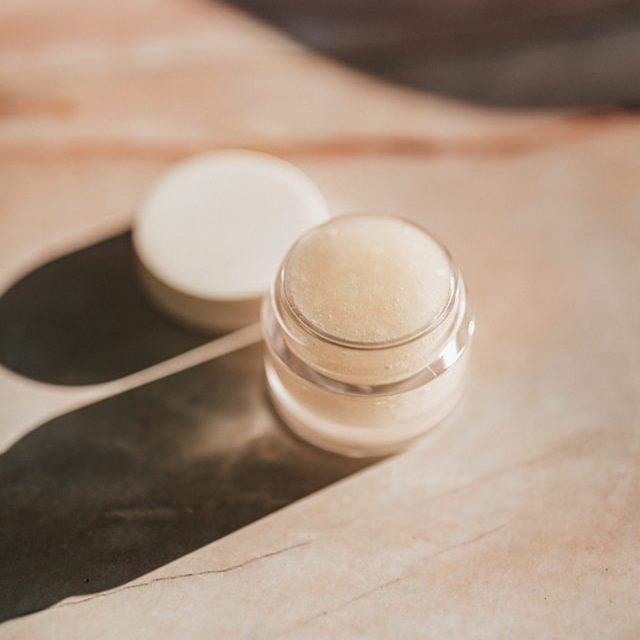
The Benefits of Natural and Organic Ingredients
The reason why a natural lip balm is much more effective than one you buy from the store, is because of it’s ingredients. While cheap bought lip balms from commercial stores contain ingredients for marketing purposes, a homemade lip balm won’t contain unnecessary ingredients!
Instead, this DIY lip balm contains natural oils and organic ingredients that are truly beneficial for your lips. Every single ingredient will be repairing and moisturizing to your lips! Here are the ingredients used in this natural lip balm recipe and all its healing and nourishing properties!
Beeswax
Beeswax is an amazing natural wax created by honey bees. It has been used by humans for centuries for different purposes, like making candles, treating wood and of course for skin care and beauty.
Beeswax has many great properties for the skin. Because it’s high in wax esters, beeswax locks in any moisture that you already have on your skin. This helps your lips to remain moisturized. Beeswax is also anti-bacterial and anti-fungal and therefor also works as a natural preservative in skin care products. It furthermore helps against itching and brings relief on burns.
When beeswax is used on the lips, it creates a protective layer on them that lasts a good while! The layer helps to protect your lips from the environmental damage such as cold, wind, dust and sun. When your natural lip balm contains beeswax, you don’t have to reapply it often. Because the beeswax in the lip balm keeps all the ingredients locked on your lips and prevents it from dissolving too quickly. This natural protective ingredient is amazing to use in a homemade lip balm and also has a wonderful natural honey fragrance.
Beeswax however, is made by bees for themselves. They use it to store and seal their honey in and to provide an environment that help raise their young. Taking the beeswax from a beehive, has to be done considerate and respectfully, so it doesn’t harm the bees. It makes it therefore very important to know your source of beeswax! Because there are producers out there that sell beeswax without caring for the well-being of the bees. The best is to get your beeswax from a local bee keeper you know treat their bees well.
Beeswax recommendations:
✧ Beeswax from a local beekeeper you know and trust.
✧ Organic Swedish Beeswax
Shea butter
Shea butter is another natural ingredient that has been used in cosmetic products for centuries. It comes from the seeds of the Shea tree that grow in west Africa. Shea butter contains vitamins that are great for the skin, such as vitamin E and A. Vitamin E aids the skin it repairing itself and fights free radicals, as it is an anti-oxidant. The vitamin A helps to restore and regenerate the skin and also makes the skin soft and flexible. As Shea butter is both anti-inflammatory and an anti-oxidant, it is also a great anti-aging ingredient.
Shea butter is easy for your skin to absorb. It easily penetrates the skin and helps to deeply nourish the cells within. Shea butter also prevents dry lips by helping to trap moisture into them and softening the skin. Furthermore it helps to reinforce the natural skin barrier that protects your skin from environmental damage. Shea butter is therefore a great and effective ingredient in lip balm!
Organic Shea butter recommendations:
✧ Organic Shea butter – Healthwell
Coconut oil
Coconut oil is a moisturizing and skin softening ingredient that is great for the lips. It helps against dry and chapped lips by seeping through the skin and locking moisture into it. As it also is anti-bacterial and anti-fungal, it helps to keep bacteria and other micro organisms away (both in the lip balm and on your lips!). It is furthermore anti-inflammatory and can provide relief from dry, swollen and irritated lips.
The skin on your lips is thin and therefore more sensitive to weather damage. It also looses moisture quicker than the rest of your skin. Coconut oil acts like a barrier on the lips that protects them from weather damage and loosing moisture. It also partially protects skin from UV radiation, as coconut oil has a natural SPF of one to seven depending on the study.
Coconut oil is a beautiful nourishing ingredient for a natural lip balm. With its mild coconut flavor, it makes the lip balm smell and taste delicious. Also its consistency is perfect for a lip balm. Coconut oil is firm at room temperature, but softly melts when applied on the lips. With all these factors in mind, coconut oil makes a perfect ingredient in a natural lip balm recipe.
Organic coconut oil recommendations:
✧ Extra Virgin & Cold pressed Organic – Healthwell
Sweet almond oil
Sweet almond oil is an ingredient that has many skin healing properties. It is filled with nourishing nutrients that do wonders for skin. For example, it is used to treat dry skin, eczema and even to improve complexion and skin tone.
Sweet almond oil is a light oil that will be quickly absorbed by the skin and leave your lips soft and supple. The fatty acids help to retain moisture in your lips, leaving them plump and hydrated. Not only is sweet almond oil moisturizing and nourishing, but it protects the lips as well. It is high in vitamin E, which acts as an anti-oxidant and fights free radicals that can cause skin damage. Furthermore, sweet almond oil can partially protect against UV radiation, as it has a natural SPF of around 4,5.
It is however important to keep in mind that it is a liquid oil, so we can’t use too much of it as it will make the lip balm too soft.
Again, sweet almond oil is a wonderful natural ingredient for lip balms, as it rejuvenates the lips and leaves them silky smooth.
Sweet almond oil recommendations:
✧ Organic almond oil – Healthwell
Essential oils
Essential oils are compounds extracted from a plant, and the oils contains the typical scent and essence of the plant. Adding essential oils to the natural lip balm adds even more healing effects to it and also makes it smell divine! However, they are optional, so you can easily leave it out if you want to have a more neutral lip balm.
There are many healing essential oils to choose from. Here are some recommendations of essential oils that are especially good for the lips:
- Lavender– soothing and promotes wound healing.
- Geranium– anti-inflammatory and soothes swollen and chapped lips.
- Chamomile– soothing, healing and anti-inflammatory.
You can of course choose other essential oils as well. But watch out for citrus essential oils! They are phototoxic, which means that they make the skin more sensitive to burns and rashes when exposed to sunlight. Some examples of phototoxic essentials oils are: lemon, grapefruit, bitter orange, lime, cumin and bergamot.
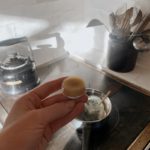
How to Make Natural Lip Balm
There are many different recipes out there on how to make a lip balm. This recipe is 100% natural and only contains high quality ingredients that are truly beneficial to your lips. Be sure to use organic ingredients as they are the best option for your lips and the earth! This recipe is making 3 tins/sticks of lip balm.
Ingredients
- 5×5 cm beeswax sheet (about 7 grams)
- 1 teaspoon organic Shea butter
- 1/2 teaspoon organic coconut oil
- 1/2 teaspoon organic sweet almond oil
- Optional: 1-5 drops of organic essential oil of choice (not too much as it can irritate your lips!)
Supplies
- Saucepan
- Glass jar
- Something to stir with
- Teaspoon
- Empty containers
How to
- Make sure you have all your ingredients at hand and that all your supplies are clean.
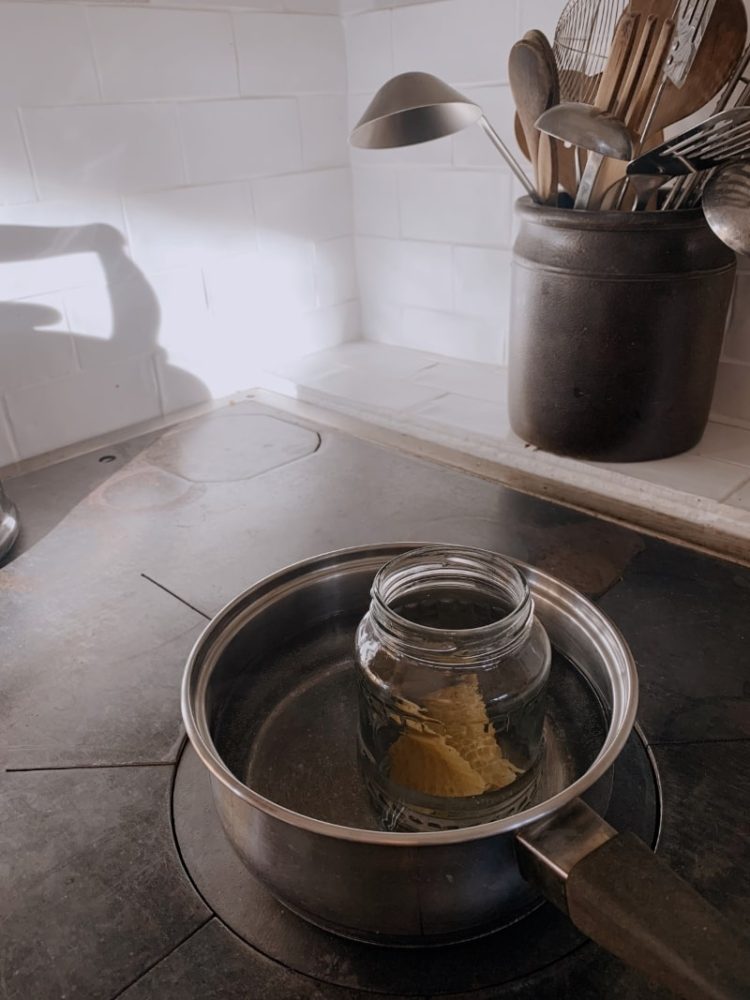
- Put the saucepan on the stove on medium heat and add in water.
- Put beeswax, Shea butter and coconut oil in a glass jar, and put the glass jar into the saucepan with water.
- Slowly heat the glass jar until all the ingredients have all melted into liquid.
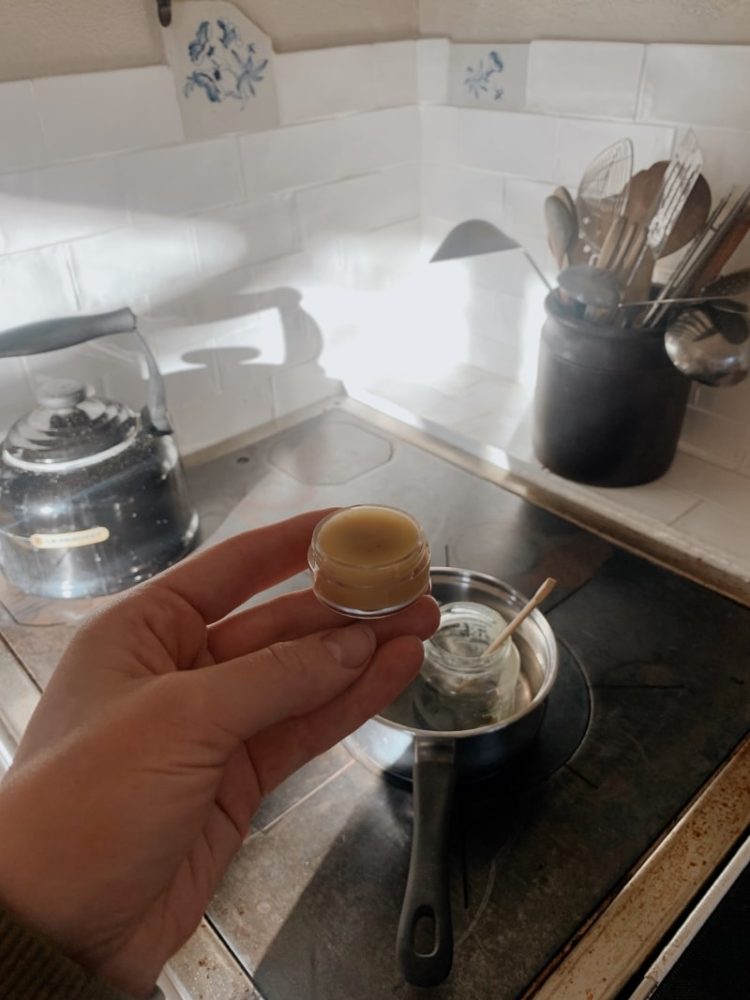
- Take the glass jar out of the hot water and prepare your lip balm containers.
- Add in the sweet almond oil and optionally essential oils and combine it well with a fork or spoon.
- Pour the still liquid mixture into the containers and let them cool completely. Done!

Things to Think about When Making Homemade Lip Balm
Look out for allergic reactions.
Always try a small path of lip balm/the ingredients you’re going to use on your inner arm and wait 24 hours to see if your skin reacts to it! Don’t use ingredients that you are allergic to.
If the consistency of the lip balm is too hard/soft.
When you are not fully happy with the consistency of your lip balm you can remelt it. If you find the consistency too hard, you can add more sweet almond oil to make it softer and add less beeswax in it next time you make it. If you find the consistency too soft, you can add more beeswax.
What you can use instead of beeswax.
If you want this recipe to be completely vegan, you can switch the beeswax to cocoa butter. As cocoa butter is harder than beeswax, you may have to experiment with the quantities to get the consistency you desire.
If the lip balm wears of too quickly.
If you find that your homemade lip balm wears of too quickly, you may need to add more beeswax. You can either remelt your already finished lip balm and add in more beeswax, or simply add in more beeswax next time.
I hope you found this post informational and that your homemade lip balms turn out exactly how you want them too! If you liked this, feel free to share the articles with your friends and family. Also if you have any questions, comment down below and I will answer them!
If you are interested in more natural DIY beauty products, check out some of these posts:
- How to make a Natural Purple Toner for Blonde Hair
- How to make Bird Cherry Floral Water
- Natural Oral Care for Healthy and Beautiful Teeth
//By Bo Smit
Natural Lip Balm Recipe
Equipment
- 1 Saucepan
- 1 Glass Jar
- 1 Teaspoon
- 1-3 Empty containers (depending on size)
Materials
- 5×5 cm Beeswax sheet (about 7 grams)
- 1 tsp Organic Shea butter
- 1/2 tsp Organic Coconut oil
- 1/2 tsp Organic almond oil
- 1-5 drops Organic Essential oil of choice (optional)
Instructions
- Make sure you have all your ingredients at hand and that all your supplies are clean.
- Put the saucepan on the stove on medium heat and add in water.
- Put beeswax, Shea butter and coconut oil in a glass jar, and put the glass jar into the saucepan with water.
- Slowly heat the glass jar until all the ingredients have all melted into liquid.
- Take the glass jar out of the hot water and prepare your lip balm containers.
- Add in the sweet almond oil and optionally essential oils and combine it well with a fork or spoon.
- Pour the still liquid mixture into the containers and let them cool completely. Done!
Sources:
- Evaluation of Beeswax Influence on Physical Properties of Lipstick Using Instrumental and Sensory Methods
- Beeswax: A minireview of its antimicrobial activity and its application in medicine
- Bee Products in Dermatology and Skin Care
- Anti-Inflammatory and Skin Barrier Repair Effects of Topical Application of Some Plant Oils
- The real UVB photoprotective efficacy of vegetable oils: in vitro and in vivo studies
- In vitro sun protection factor determination of herbal oils used in cosmetics
- The uses and properties of almond oil